Digitizing Machines – Event configuration

The event configuration defines how the signals are sent to a higher-level system. Payload and endpoint are predefined by default, but can be individualized.
To configure an event, open the detailed view of the node.
In the upper right area click on the event configuration icon.
Events are used in a script to generate outgoing events. Script functions are available for this purpose, which generate a corresponding event depending on the type.
for example, the script function sendStateProduction was used, which sends the state production as an event to a third party system.
There is a standardized event for each event type. For example, the event type Quantity sends the quantity produced by the machine.
All available events can be found in the FORCE EDGE CONNECT documentation.
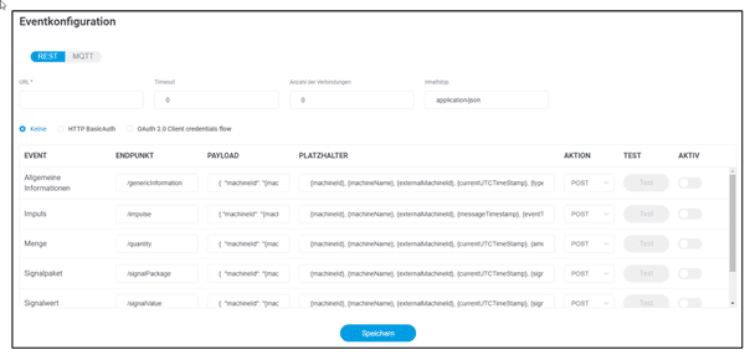
The JSON-body under PAYLOAD defines how the message to the higher-level system should look. The wildcards are finally replaced by the corresponding existing signals. Example of an event structure:
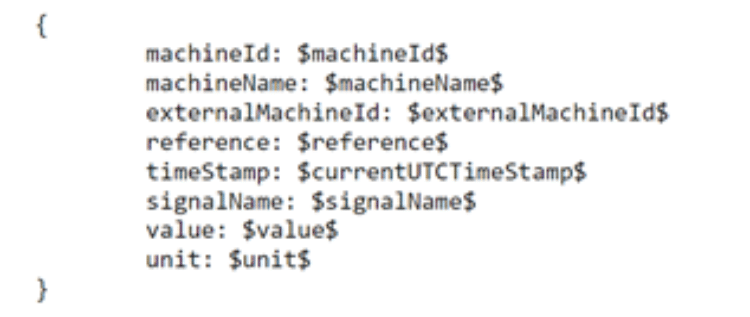
Script functions allow events to use wildcards, which can be used to pass on different information. For example, the machine ID or the time stamp can be resolved in UTC. In the documentation, you will find all available script functions, including an explanation.
If the switch under ACTIVE is activated, the corresponding event is sent. Events that are not activated are not sent.
An active event can also be tested by clicking on TEST. In the subsequent dialog, values such as machined (machine ID) or value (value) can be entered to generate and execute the signal as an example without influencing the actual machine connection. In this way, events can be tested in advance without executing them in the live environment.
Configure event
Click on the event configuration icon in the upper right area.
In the subsequent dialog, determine whether REST or MQTT is to be used.
Configure the events as desired
In the upper bar, enter the URL and optionally other details such as timeout, etc. This determines where the events should be sent to
Finally, set the desired authentication method and enter your credentials.
Click on Save to save the data